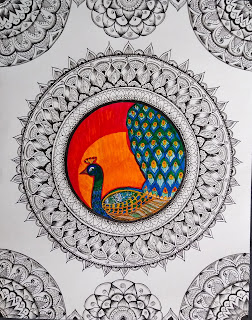
MANDALA ART DRAWING
Hello everyone,
Here I am with another simple Mandala art drawing hope you will like it. Like I said mandala art drawing is a therapy that will help you boost up your mind which is I believe, so try hard until you get into your track no matter how hard it is to follow or track. So believe in what you are doing, thinking that in my mind I did this mandala art drawing with steps for you to try.
Okay, shall we get started,
The first thing we have to start is to make circles if you are using a compass it's fair enough to make wonderful circles. If you don't have a compass or any geometrically related things then try objects that can help you draw circles of your desired sizes,
 |
| 1. Draw circles with a pencil |
 |
| 2.Use a micron pen to draw circles with the help of objects for making circles |
Now let's get into the patterns that we will start from inner circles so that they will be easy for us to follow the rest of the circles.
 |
| 3. Finished patterns of two layers of inner circles. |
 |
| 4. Next outline for the patterns on the third layer of the circle. |
Gradually draw patterns on your own or you can try these patterns as well if you like, so let's continue with simple patterns.
 |
| 5.Filled inside the outline we marked. |
 |
| 6. Now outline for the empty space in the 3rd layer of the circle. |
 |
| 7. Third layer of the circle completed. |
Now time for the next layer try simple patterns to draw, it's easy to draw with lines, and dots it will be easy I guess.
 |
| 8.Layer four completed. |
Now for the fifth layer drawing a lotus will be more fun I guess and I added leaves and triangle patterns to fill the fifth layer.
 |
| 9.Layer five completed lotus looks cool wasn't it. |
 |
| 10. Completion of our circle. |
I thought near the big circle a Small circle will look pretty cool. So I did a small circle on the top and the bottom of the paper. So to complete those circles follow steps 11 to 14,
 |
| 11. Outline for small circles. |
 |
| 12. Start drawing patterns from the inner circles of the small circles. |
 |
| 13. Finished patterns for small circles. |
 |
| 14. Completed our mandala art drawing. |
I used the repeated patterns on both the small circles to make them look alike and we did it. now time for pencil shading once the Micron pen work is done I used to do black color pencil shade on the dark side of the patterns so it looks vibrant. I m sure you can find the slight difference easily,
 |
| 15.Shading completed. |
 |
| 16. Just do the shades near the lines of the circle. |
Now my favorite part let's bring the lotus into our mandala. For this first thing make a pencil outline for the lotus even a rough sketch also fine but make sure you won't make mistakes while doing sketch work just follow the followings steps to our micron magic.
 |
| 17. Pencil outline for lotus. |
 |
| 18. Coloring done. |
In image 18, I have blended two colors using the sketch for this first shade the majority pink color by leaving the space for the small space for yellow color slightly do the shade to blend the colors. Once the coloring was done do the strokes and pollens with the micron pen like this( look at image 19).
 |
| 19. Micron pen work is done on a lotus and its leaves |
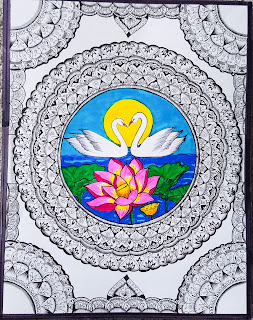
I filled the background with light bluish-green color to bring a vibrant look to the lotus and finally, we are all done.
 |
| 20. Final image of our Mandala and lotus. |
That's it our mandala art drawing is completed I hope the above steps will be helpful for you to make your own mandala art drawing.


Comments
Post a Comment